

Overview
In the websiteManagement section, you can centrally manage settings necessary for website operation such as publication status, domains, SEO & GEO, analytics, blog, email, payments, and more.
It is recommended to first check the items necessary for publication, then add settings after publication according to your goals such as attracting visitors, measurement, inquiries, and sales.
Open the Management Dashboard
You can open the settings necessary for website operation from theManagement tab at the top of the website screen.
- Open the target website
- Open
Managementon the website screen - Select the setting item according to your purpose
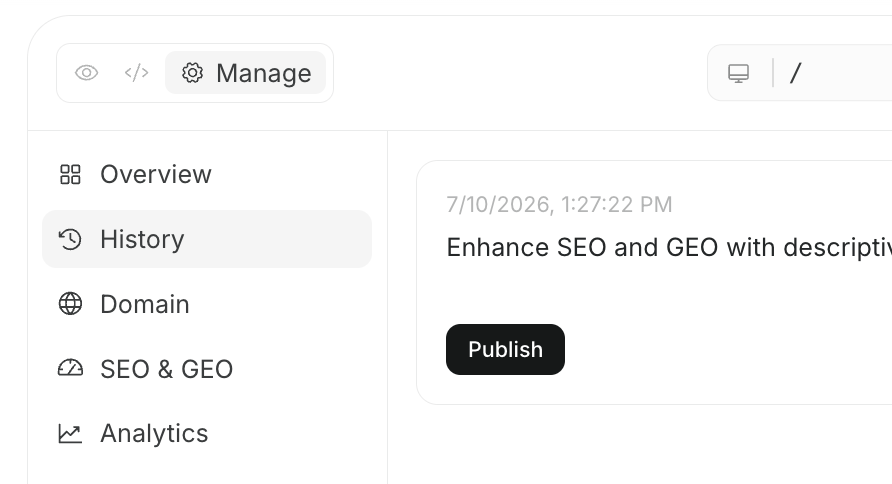
Main Setting Items
Domain
InDomain, you manage the website’s public URL and custom domains.
Using a custom domain allows you to publish your website with a URL that matches your brand or service name.
If you use a domain obtained externally, DNS settings may be required.
SEO & GEO
InSEO & GEO, you manage settings aimed at search engines and AI search. First, check the score to understand what is needed.
Typical settings include:
- Refining page titles and descriptions
- Managing sitemaps
- Configuring llms.txt
- Setting structured data
- Linking blog and page updates with search-related information
Analytics
InAnalytics, you handle measurement and analysis settings such as Google Analytics and Google Search Console.
Setting up measurement makes it easier to make improvement decisions after publication, such as:
- Which pages are being viewed
- Which search queries are driving traffic
- Which CTAs or flows should be improved
- Whether post-publication changes affect results
Blog
InBlog, you manage blogs and article content linked to your website.
Using a blog allows you to accumulate SEO articles, case studies, news, know-how articles, and more within your website.
Managing the main site and blog together makes it easier to create flows from articles to service pages or inquiries.
Payments
InPayments, you configure Stripe settings to accept product sales, reservation deposits, subscriptions, and more on your website.
First, confirm that a Stripe account is connected to your workspace. If not connected, connect Stripe in the integration settings, then select the Stripe account to use for this site.
Enabling Stripe allows you to link payments, subscriptions, and customer portals from your website. The payment secret is not directly exposed on the generated site.
Main setup steps are as follows:
- Open
Payments - Select the Stripe account to connect to this site
- Execute
EnableorUpdate - If needed, enter product name, description, amount, currency, and payment interval to create a price
- Copy the created price ID
- Request in chat: “Please add a checkout flow using this price ID”
Email, you configure the sender for emails sent from the site, notifications after form submissions or lead acquisition.
Enabling email allows notifications to be sent to the notification email address when inquiries or form submissions occur. Also, setting the sender name and address allows you to align the email sender with your brand.
Main settings include:
If you want to send from a custom address, add the sending domain from
Manage Senders and verify by setting DNS records. For Gmail, connect and select the Gmail sender.
For sites with inquiry or document request forms, always check notification email and sender settings before publishing. Setting these makes it easier to respond promptly to acquired leads.
Database
InDatabase, you manage storage destinations for data handled within the website such as form submissions, lead information, order information, and member data.
Setting up a database allows you to not just temporarily notify received information but also view it as a list and use it later for email sending or customer support.
Main use cases:
With managed DB, you can add tables, add fields, and check row data. If there is an email column, you can send emails per row.
If connected to Supabase, tables and data are managed on the Supabase dashboard. When switching from managed DB to Supabase, migrate existing tables and rows to the selected Supabase project before switching.
If connected to external Postgres, table management is done on the Postgres side. NoimosAI manages the connection state for reading/writing from the site.
For sites with forms, member registration, reservations, or order management, confirm the storage destination before publishing.
Users
InUsers, you can check users registered on the public site.
This is used if your website has login or membership registration features. If authentication is not yet enabled, it will display “This site does not yet have login/membership registration features.”
To add membership registration, request in chat:
AI
InAI, you configure AI features used on your website.
For example, use this to add visitor chatbots, image generation, video generation, etc. Adding AI features allows visitors to ask questions on the site or use AI functions tailored to specified purposes.
Main settings:
Selecting chatbots, image generation, or video generation from
Add AI features to site inserts a draft in chat. Add necessary requirements and send to request adding AI features to the site.
After enabling AI, preview actual responses and flows before publishing. If knowledge is insufficient, answers tend to be vague, so it is recommended to prepare datasets and knowledge first.
Knowledge
InKnowledge, you save foundational information used for editing this website and AI features.
Content saved here is used as persistent instructions AI references in future website edits. You don’t need to explain the same brand info or rules in chat every time, making it easier to unify site style and content.
Examples of good content to input:
- Brand colors, fonts, design atmosphere
- Company name, service name, store info, business hours
- Pricing plans, service areas, supported tasks
- Allowed expressions, expressions to avoid
- Frequently asked questions and answers
- CTA priorities
GitHub
InGitHub, you can export your website code to a GitHub repository or import changes from GitHub into NoimosAI.
Connecting GitHub allows developers to review code or edit externally and import changes. Use this when you want to separate editing on NoimosAI and development work on GitHub.
When starting to manage an existing site with NoimosAI, it is recommended to import into a duplicate repository or working branch and check preview before connecting directly to the production repository.
Main operations:
If there are new commits on GitHub, import them before making changes in NoimosAI to reduce overwriting repo changes.
GitHub integration is for code management. To reflect changes on the published site, review changes and then publish or update.
Figma
InFigma, connect your Figma personal access token so the builder can read reference designs.
Connecting Figma makes it easier to adjust website structure and appearance while referencing Figma designs in chat. Use this when creating a website based on existing LP designs, brand guides, or component designs.
Setup steps:
- Open
Figma - Select
Connect - Paste your Figma personal access token
- Save
Recommended Items to Check First
When publishing a website for the first time, first check the items necessary for publication.- Check site status in
Overview - Confirm public URL in
Domain - Check titles and descriptions in
SEO & GEO - Confirm measurement settings in
Analytics